Chicco Car Seat Instructions: A Comprehensive Guide

Navigating Chicco car seat usage requires understanding specific models and their features. Adapters ensure compatibility‚ while manuals offer detailed guidance for safe installation and adjustments.
Understanding Chicco Car Seat Models
Chicco offers a diverse range of car seats designed to accommodate children from birth through their early years. These models vary significantly in features‚ installation methods‚ and weight/height limits. Key series include the Seat2Fit i-Size‚ known for its adaptability and compliance with the latest i-Size safety standards (ECE R129/03). This model is designed for children from 40-150cm‚ essentially covering the entire period of car seat usage.
Other notable models‚ like the Seat Up 012‚ cater to a broad age range‚ from birth up to approximately 12 years old (76-150cm). These “all-in-one” seats offer convenience by eliminating the need to purchase multiple car seats as your child grows. Understanding the specific model is crucial‚ as installation procedures and adjustment mechanisms differ. Some seats utilize ISOFIX connectors with a Top Tether for enhanced stability‚ while others rely on traditional seat belt installation.
Furthermore‚ Chicco provides car seat adapters to ensure compatibility with various strollers‚ streamlining travel with your little one. Always consult the specific car seat’s manual to determine approved adapter models and proper usage. Correctly identifying your Chicco car seat model is the first step towards ensuring your child’s safety and comfort during every journey.
Identifying Your Specific Chicco Car Seat
Accurately identifying your Chicco car seat model is paramount before consulting instructions or making adjustments. Locate the model number‚ typically found on a sticker affixed to the car seat’s base or rear shell. Common models include the Seat2Fit i-Size‚ Seat Up 012‚ and various combinations of infant carriers and bases. This number is crucial for downloading the correct manual from Chicco’s support resources.
Pay close attention to the manufacturing date‚ often included alongside the model number. Car seat designs and safety standards evolve‚ so using a manual specific to your car seat’s production year is essential. The sticker may also display the ECE approval number (e.g.‚ ECE R129/03)‚ confirming compliance with European safety regulations.

If the sticker is damaged or missing‚ carefully examine the car seat’s features and design. Compare it to images and descriptions available on the Chicco website or in retailer catalogs. Knowing whether your seat utilizes ISOFIX connectors‚ a seat belt installation‚ or requires a separate base will significantly narrow down the possibilities. Once identified‚ accessing the correct manual – often available via a QR code on the seat itself – will provide tailored instructions for safe and proper use.
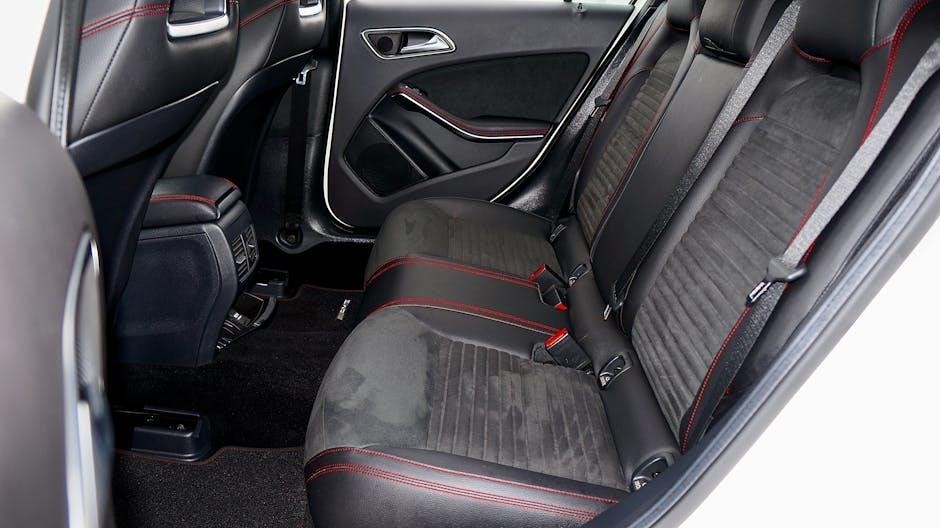
Essential Car Seat Components
Understanding the core components of your Chicco car seat is vital for correct installation and operation. The shell provides the primary protective structure‚ while the harness – typically a five-point system – secures the child. Familiarize yourself with the buckle‚ shoulder straps‚ and crotch strap‚ ensuring they are in good working order.
Key adjustment features include the headrest‚ which offers height customization as your child grows‚ and recline positions‚ allowing for comfortable positioning. Many models incorporate ISOFIX connectors or seat belt guides for secure attachment to the vehicle. If your seat utilizes a base‚ understand its locking mechanisms and level indicators.
Additional components may include side impact protection‚ designed to absorb energy during a collision‚ and adapters for compatibility with specific strollers. The top tether‚ when applicable‚ provides an extra anchor point for increased stability. Regularly inspect all components for wear and tear‚ and refer to your manual for specific maintenance guidelines. Correctly identifying and understanding each part ensures optimal safety for your child.
Installation Methods: ISOFIX
ISOFIX provides a standardized‚ secure method for car seat installation. Locate the ISOFIX anchor points within your vehicle – typically found between the seat back and cushion. Connect the car seat’s ISOFIX connectors to these anchor points‚ ensuring a firm click to confirm engagement. Always consult your vehicle’s manual to pinpoint the exact location of the anchor points.
Many Chicco car seats feature visual indicators to confirm correct ISOFIX attachment. These may include green markings or audible clicks. Crucially‚ utilize the top tether in conjunction with ISOFIX for enhanced stability‚ if your car and car seat model support it. The tether anchors to a designated point in your vehicle‚ minimizing forward movement during a collision.
After connecting the ISOFIX base‚ verify the installation’s security by attempting to move the car seat side-to-side and front-to-back. It should remain firmly in place with minimal movement. Remember‚ proper ISOFIX installation is paramount for child safety. Refer to both the car seat and vehicle manuals for detailed instructions and specific guidance related to your models.
Installation Methods: Seat Belt
When ISOFIX isn’t available‚ secure installation using the vehicle’s seat belt is essential. Route the seat belt through the designated belt path on the Chicco car seat‚ following the instructions detailed in your car seat’s manual. Ensure the belt lies flat and isn’t twisted.
To tighten the seat belt‚ push down firmly on the car seat while simultaneously pulling the shoulder belt to remove any slack. A snug fit is critical; the car seat should not move more than one inch side-to-side or front-to-back when tested at the belt path. Locking the seat belt is often necessary – consult your vehicle’s manual to determine how to engage the locking mechanism (e.g.‚ latch plate mechanism or automatic locking latch).
Verify the seat belt is securely locked and that the car seat is firmly anchored. Regularly check the tightness of the seat belt‚ especially after adjustments or during long journeys. Remember‚ correct seat belt installation is vital for optimal child protection. Always prioritize reviewing both the car seat and vehicle manuals for specific guidance tailored to your models.
Harness System Adjustment
Proper harness adjustment is paramount for your child’s safety within the Chicco car seat. Begin by ensuring the harness straps are at or above your child’s shoulders for rear-facing installations‚ and at or below the shoulders for forward-facing. Adjust the strap height using the designated slots in the car seat’s shell.
To tighten the harness‚ pull the adjustment strap located at the base of the car seat. The straps should be snug enough that you cannot pinch any excess webbing at your child’s collarbone. A “pinch test” confirms a secure fit. Avoid adding bulky clothing or padding under the harness‚ as this can compromise its effectiveness in a crash.
The chest clip should be positioned at armpit level‚ ensuring it’s neither too high nor too low. Regularly check the harness fit‚ as children grow quickly. Adjust as needed to maintain a secure and comfortable fit. Refer to your car seat manual for detailed illustrations and specific instructions related to your Chicco model.
Recline Positions and Adjustment
Chicco car seats often feature multiple recline positions designed to accommodate infants and growing children‚ prioritizing both comfort and safety. Understanding how to adjust these positions correctly is crucial. Always consult your specific car seat’s manual for detailed instructions‚ as mechanisms vary between models.
For rear-facing infants‚ a more reclined position is generally recommended to provide optimal head and neck support. As your child grows and gains head control‚ you can gradually adjust to a more upright position. Forward-facing car seats typically offer fewer recline options‚ primarily for comfort during longer journeys.
To adjust the recline‚ locate the designated recline mechanism – often a handle or lever near the base of the car seat. Ensure the car seat clicks securely into each recline position; Never modify or attempt to force the recline mechanism. Incorrect recline angles can compromise the car seat’s protective capabilities in a collision. Prioritize following the manufacturer’s guidelines.
Headrest Adjustment
Proper headrest adjustment is paramount for your child’s safety and comfort within a Chicco car seat. The headrest should always be positioned to cradle your child’s head‚ ensuring it remains within the protective shell of the seat. Adjusting the headrest is directly linked to your child’s height and stage of development.
Most Chicco car seats feature a height-adjustable headrest‚ typically operated by a lever or button located at the top of the seat. As your child grows‚ raise the headrest to maintain appropriate support. The top of the headrest should be at or slightly above your child’s shoulders. Ensure the harness straps are also adjusted concurrently with the headrest.

Incorrect headrest positioning can lead to reduced protection in the event of a crash. Always refer to your car seat’s manual for specific instructions and height guidelines. Regularly check the headrest adjustment as your child experiences growth spurts. A correctly adjusted headrest minimizes head excursion during impact‚ significantly enhancing safety.
Car Seat Adapters: Compatibility & Use
Chicco car seat adapters facilitate seamless integration with compatible strollers‚ creating travel systems for enhanced convenience. However‚ it’s crucial to verify adapter compatibility with both your specific Chicco car seat and stroller model before use. Using an incompatible adapter can compromise safety and stability.
Refer to the adapter’s instruction manual (e.g.‚ 20110741‚ 501-8313-01) and the Chicco website (www.chicco.com) for approved car seat model lists. Installation typically involves attaching the adapter to both the car seat base and the stroller frame‚ following the provided diagrams carefully. Ensure a secure and stable connection before placing the car seat onto the adapter.
Always prioritize safety; never use a damaged or modified adapter. Regularly inspect the adapter for wear and tear. Proper adapter use allows for effortless transfer of your sleeping infant from the car to the stroller‚ minimizing disruption. Remember to always consult the car seat manual for complete guidance and safety precautions.
Securing the Base (if applicable)
For Chicco car seat models utilizing a base‚ proper securing is paramount for infant safety. The base provides a stable platform and simplifies car seat installation. Installation methods typically involve either the ISOFIX system or the vehicle’s seat belt – always choose one method and follow instructions meticulously.
When using ISOFIX‚ ensure the base clicks firmly into the vehicle’s anchor points. Verify the visual indicators confirm a secure connection. If utilizing the seat belt‚ thread it correctly through the designated belt path on the base‚ ensuring it lies flat and isn’t twisted. Tighten the seat belt firmly‚ eliminating any slack.

Crucially‚ the base should not move more than one inch side-to-side or front-to-back once installed. Some models feature a Top Tether connection for added stability; utilize this if available and follow the specific instructions. Always double-check the installation before each journey‚ and consult the car seat manual for detailed guidance specific to your model.
Top Tether Usage
The Top Tether is a crucial safety feature found on many Chicco car seat models‚ significantly enhancing stability and reducing forward movement during a collision or sudden braking. It connects the car seat to a designated anchor point within the vehicle‚ typically located on the rear shelf or seatback.
To utilize the Top Tether‚ locate the anchor point in your vehicle – consult your vehicle’s manual for its precise location. Attach the tether strap to this anchor point‚ adjusting the length to eliminate slack while ensuring it remains untwisted. The strap should be taut but not overly tight‚ allowing for slight movement.
Proper tether usage minimizes rotation‚ reducing the risk of head injury. Ensure the tether is securely fastened before each journey and regularly inspect it for wear or damage. Some models require the Top Tether to be engaged for forward-facing installation‚ as outlined in the car seat manual. Always prioritize following the manufacturer’s instructions for optimal safety and performance.
Checking for Correct Installation
Ensuring a properly installed Chicco car seat is paramount for your child’s safety. After installation‚ whether using ISOFIX or the seat belt method‚ perform a series of checks to confirm security. Begin by verifying the car seat is firmly attached to the vehicle’s structure – it shouldn’t move more than one inch side-to-side or front-to-back when tested at the belt path.
Next‚ confirm the Top Tether (if applicable) is securely connected and taut. Inspect the harness straps‚ ensuring they lie flat and are not twisted. Perform the “pinch test” – if you can pinch any slack in the harness straps near the collarbone‚ tighten them further. Verify the recline angle is appropriate for your child’s age and weight‚ as indicated in the manual.
Finally‚ double-check all connections and adjustments. If you are unsure about any aspect of the installation‚ consult the Chicco car seat manual or seek assistance from a certified Child Passenger Safety Technician (CPST). Regularly re-check the installation‚ especially after vehicle maintenance or adjustments.
Cleaning and Maintenance
Maintaining a clean Chicco car seat is crucial for hygiene and longevity. Regularly vacuum the seat to remove crumbs and debris. For plastic components‚ use a mild soap and warm water solution; avoid harsh chemicals or abrasive cleaners that could damage the material. The fabric covers are often removable and machine washable – always check the car seat manual for specific washing instructions‚ including water temperature and drying methods.
Inspect the harness straps frequently for wear and tear. If you notice any fraying‚ cuts‚ or damage‚ replace the harness immediately. Periodically check the buckles for proper function‚ ensuring they click securely and release easily. Avoid using lubricants on the buckles‚ as this can interfere with their operation. Ensure the car seat is completely dry before reinstalling any fabric covers.
Store the car seat in a cool‚ dry place when not in use. Do not expose it to extreme temperatures or direct sunlight for extended periods. Following these simple cleaning and maintenance steps will help ensure your Chicco car seat remains safe and comfortable for your child.
Safety Precautions and Warnings
Always read and fully understand the Chicco car seat manual before installation and use. Never use a car seat that has been involved in a moderate to severe collision‚ even if there is no visible damage. Ensure the car seat is appropriate for your child’s weight and height‚ adhering to the manufacturer’s guidelines – models are approved for specific size ranges (e.g.‚ 40-150cm).
Never leave your child unattended in the car seat. Do not modify the car seat in any way‚ including adding aftermarket products or altering the harness system. Confirm proper installation using either ISOFIX or the seat belt method‚ verifying secure attachment to the vehicle. Regularly check the tightness of the harness straps‚ ensuring a snug fit – two fingers should fit under the strap at the shoulder.
Be aware of the car’s airbags and never place a rear-facing car seat in front of an active airbag. Adhere to the ECE R129/03 regulations for child restraint systems. Prioritize safety by consistently following all instructions and warnings provided by Chicco;
Chicco Car Seat Manuals & Support Resources
Accessing comprehensive support for your Chicco car seat is crucial for safe and correct usage. Chicco provides readily available manuals for various models‚ including the Seat2Fit i-Size‚ accessible for free PDF download online. These manuals detail installation procedures‚ adjustment guides‚ and crucial safety information.
For specific model instructions‚ visit the official Chicco website and navigate to the autositz (car seat) Anleitung section. Utilize the QR codes often found on the car seat itself to directly link to the relevant digital manual. Explore online resources for frequently asked questions‚ troubleshooting tips‚ and video tutorials demonstrating proper installation techniques.
Should you require further assistance‚ Chicco’s customer support team is available to address your concerns. Remember to have your car seat model number (e.g.‚ 20110741) readily available when contacting support. Prioritize official Chicco resources to ensure accurate and up-to-date information regarding your car seat.