GE Double Oven Manual: A Comprehensive Guide
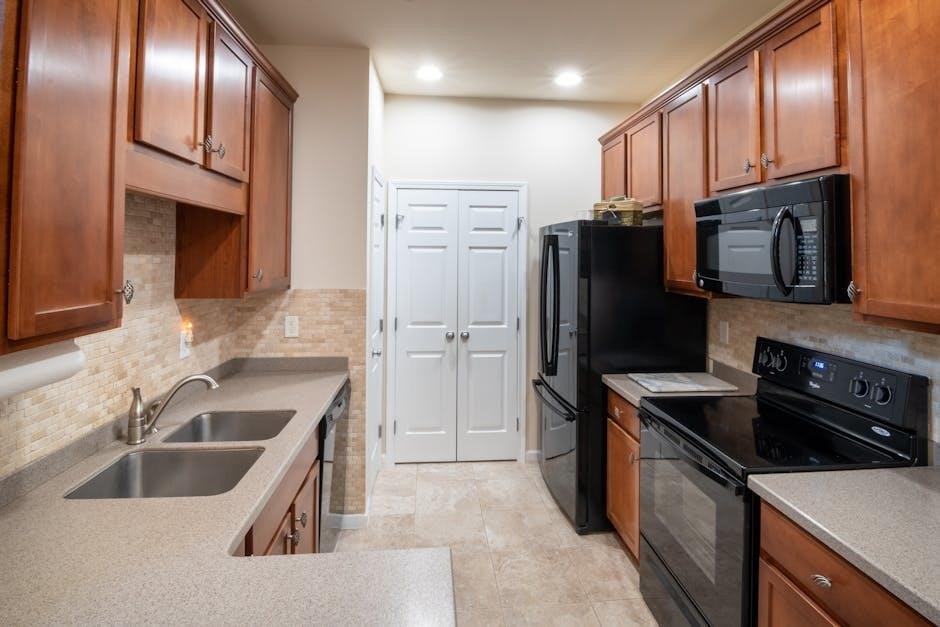
This manual provides detailed instructions for GE Profile double convection wall ovens‚ like the PT9550SFSS model‚ priced at $3‚699‚ offering smart features and advanced cooking capabilities․
GE double ovens represent a significant advancement in home cooking technology‚ offering unparalleled versatility and convenience for the modern kitchen․ These appliances‚ particularly models like the GE Profile PT9550SFSS‚ are designed to streamline meal preparation‚ boasting features that cater to both novice and experienced cooks․
With a price point firmly in the luxury appliance category at $3‚699‚ GE double ovens deliver a premium experience․ The inclusion of advanced convection systems‚ like true European convection‚ ensures even cooking and faster preheating times․ Beyond basic functionality‚ many models incorporate smart technology‚ such as remote control via a dedicated app‚ enhancing usability and control․
This comprehensive guide aims to familiarize you with all aspects of your GE double oven‚ from understanding its features and functions to performing routine maintenance and troubleshooting common issues․ Prepare to unlock the full potential of your appliance and elevate your culinary creations!
Understanding Your Model Number
Your GE double oven’s model number is crucial for accessing specific information‚ parts‚ and support resources․ Located on the appliance’s frame – often visible when the oven door is open – this alphanumeric code provides a detailed breakdown of your oven’s specifications and manufacturing details․
For example‚ the GE Profile Built-In Electric Double Convection Wall Oven PT9550SFSS utilizes this system․ “PT” designates the product category‚ “9550” identifies the specific series and features‚ and “SFSS” indicates the finish (stainless steel)․ Knowing this code allows you to quickly locate relevant documentation‚ including this manual‚ and ensures you order the correct replacement parts if needed․
When contacting GE appliance support or searching for online resources‚ always have your model number readily available․ It streamlines the process and guarantees you receive accurate assistance tailored to your specific oven configuration․ This simple code unlocks a world of support!
Safety Precautions
Before operating your GE double oven‚ carefully review these essential safety precautions․ Always ensure the oven is properly installed and grounded by a qualified technician․ Never attempt to repair the appliance yourself; contact GE appliance support for assistance․
Exercise extreme caution during operation as surfaces become very hot․ Avoid touching heating elements or interior surfaces while the oven is in use or immediately after․ Keep flammable materials away from the oven‚ and supervise children closely when the appliance is operating․
Be mindful of the self-cleaning cycle‚ as it generates high temperatures․ Do not open the oven door during this process․ If smoke is detected‚ immediately stop the cycle and contact support․ Regularly inspect the power cord for damage‚ and never use an extension cord․ Prioritizing safety ensures a pleasant cooking experience․
Oven Features & Functions
GE double ovens boast advanced features like convection cooking‚ self-cleaning‚ steam clean‚ proofing‚ and temperature probe functions‚ enhancing cooking precision and convenience for users․
Convection Cooking Explained
Convection cooking utilizes a fan to circulate hot air within the oven‚ resulting in faster and more even cooking compared to traditional baking methods․ This technology ensures consistent temperatures throughout the oven cavity‚ eliminating hot and cold spots that can lead to unevenly cooked dishes․
GE double ovens often feature multiple convection settings‚ catering to various cooking needs․ Standard convection employs a single fan‚ while advanced systems‚ like True European Convection (discussed separately)‚ utilize a third heating element near the fan for superior performance․
The circulating air effectively removes moisture‚ promoting browning and crisping‚ particularly beneficial for roasting meats and baking pastries․ Convection cooking can often reduce cooking times by approximately 25%‚ making it an efficient option for busy cooks․ It’s important to note that recipes may require slight adjustments when using convection‚ often involving a temperature reduction․
True European Convection
True European Convection represents a superior convection cooking system found in select GE double oven models․ Unlike standard convection‚ which uses a single fan‚ True European Convection incorporates a third heating element positioned directly in front of the fan․ This innovative design ensures consistent and precise heat distribution throughout the oven interior․
The added heating element compensates for heat loss when the fan is operating‚ maintaining a remarkably stable temperature․ This results in even faster preheating times‚ more uniform cooking‚ and enhanced browning capabilities․ It’s particularly effective for baking delicate pastries‚ roasting meats to perfection‚ and achieving consistently golden results․
GE’s implementation of True European Convection elevates cooking performance‚ offering a noticeable improvement over traditional convection systems․ Users can expect more predictable and reliable outcomes‚ simplifying complex recipes and delivering professional-quality results at home․
Self-Cleaning Cycle Operation
The self-cleaning cycle on your GE double oven utilizes high temperatures to efficiently burn off food residue‚ eliminating the need for manual scrubbing․ Before initiating the cycle‚ remove oven racks‚ cookware‚ and any loose debris․ Ensure the oven door can lock securely – a crucial safety feature during operation․
Select the desired cleaning cycle length; options typically include light‚ medium‚ and heavy‚ corresponding to the level of soil․ The door will automatically lock‚ and the oven will heat to extremely high temperatures․ A burning odor is normal during this process‚ so ensure adequate ventilation․
Once the cycle completes and the oven cools‚ the door will unlock․ Wipe away any remaining ash with a damp cloth․ Caution: Do not interrupt the self-cleaning cycle‚ and avoid opening the door until it has fully cooled and unlocked․ Always refer to your specific model’s manual for detailed instructions and safety guidelines․
Steam Clean Function
GE double ovens often feature a Steam Clean function‚ offering a quicker and gentler cleaning alternative to the high-heat self-clean cycle․ This method utilizes steam to loosen light soils and food residue‚ making wiping easier․ To begin‚ pour approximately one cup of water into the bottom of the oven cavity․
Select the Steam Clean option on the control panel․ The oven will heat the water‚ creating steam that condenses on the oven walls‚ softening baked-on messes․ The cycle typically lasts around 30 minutes‚ followed by a cooling period․
Once cooled‚ carefully wipe down the interior with a soft cloth or sponge․ Note: Steam Clean is best suited for light cleaning and may not remove heavily baked-on residue․ For stubborn stains‚ the self-clean cycle may be necessary․ Always consult your model’s manual for specific instructions and safety precautions․
Proofing Mode – For Perfect Dough
Many GE double ovens include a dedicated Proofing mode‚ designed to create the ideal warm and humid environment for yeast dough to rise․ This eliminates the need for a warm spot in the kitchen or covering the dough with plastic wrap․ To activate Proofing‚ select the appropriate setting on the oven’s control panel․
The oven will maintain a consistent‚ low temperature – typically around 80-90°F – and introduce a small amount of humidity․ Place your dough-filled bowl directly on the oven rack․ Proofing times will vary depending on the recipe and desired rise‚ but generally range from 60 to 90 minutes․
Regularly check the dough’s progress․ Once doubled in size‚ the dough is ready for baking․ Important: Do not use Proofing mode for extended periods‚ as over-proofing can negatively affect the final product’s texture․ Refer to your oven’s manual for specific proofing guidelines․
Temperature Probe – Achieving Precise Cooking
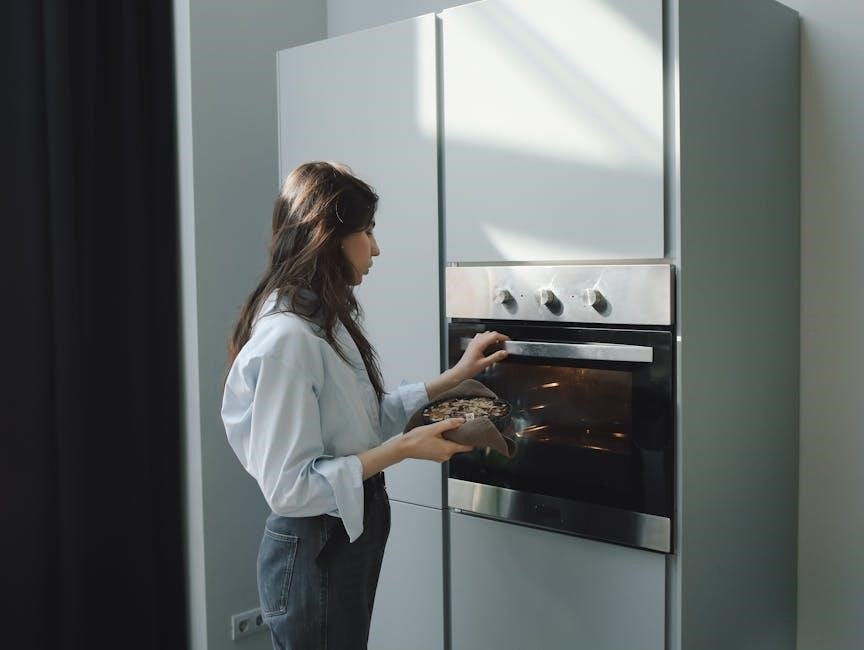
GE double ovens often feature a temperature probe‚ a valuable tool for ensuring meats‚ poultry‚ and even baked goods are cooked to perfection․ This probe continuously monitors the internal temperature of your food‚ allowing the oven to automatically shut off when the desired temperature is reached․
To use the probe‚ insert it into the thickest part of the food‚ avoiding bone․ Connect the probe to the oven’s designated port and set the target temperature using the control panel․ The oven will then cook until the probe signals completion․
This method eliminates guesswork and prevents overcooking or undercooking․ Always ensure the probe is clean before and after each use․ Refer to your oven’s manual for specific instructions on probe placement and usage‚ as well as recommended temperatures for various foods․
Control Panel & Display
GE double oven control panels utilize touchscreen interfaces and buttons for operation‚ displaying indicators and error codes to guide users through settings and functions․
Navigating the Touchscreen Interface
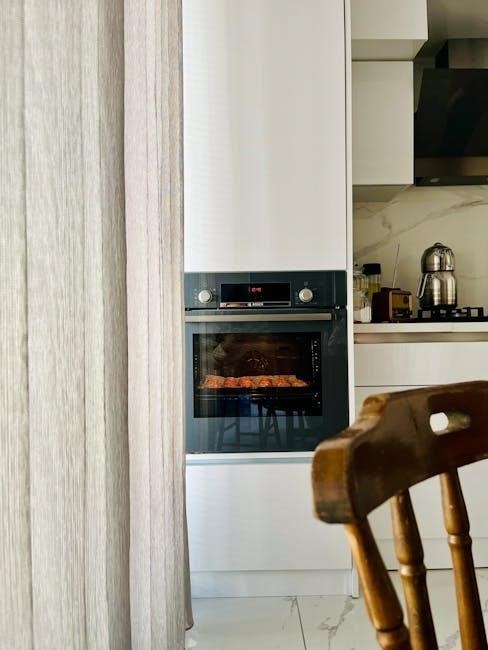
The GE Profile double oven’s touchscreen interface is designed for intuitive control‚ offering a streamlined experience for selecting cooking modes‚ adjusting temperatures‚ and accessing specialized features․ Users can easily swipe and tap through menus to navigate options‚ with clear visual cues indicating the selected function․
The display provides real-time information about the cooking process‚ including remaining time‚ oven temperature‚ and selected settings․ A dedicated app allows for remote control‚ enhancing convenience and offering additional functionalities like preheating from a smartphone․ The responsiveness of the touchscreen ensures accurate input‚ minimizing errors during operation․
Furthermore‚ the interface often incorporates customizable settings‚ allowing users to personalize their cooking experience․ The bright‚ clear display ensures readability‚ even from a distance‚ and the intuitive layout makes it easy for users of all technical skill levels to operate the oven effectively․ The touchscreen also provides access to helpful tips and troubleshooting information․
Understanding Oven Control Buttons
While many GE double ovens now feature touchscreen interfaces‚ some models retain traditional control buttons alongside or as an alternative․ These buttons are clearly labeled to indicate their respective functions‚ such as Bake‚ Broil‚ Roast‚ Convection‚ and Steam Clean․ Dedicated temperature controls allow for precise adjustments‚ while arrow buttons facilitate easy navigation through menu options․
A ‘Start’ button initiates the selected cooking cycle‚ and a ‘Stop’ or ‘Cancel’ button halts operation․ Often‚ separate buttons control each oven cavity‚ enabling independent operation of both the upper and lower ovens․ The control panel also includes a ‘Light’ button to illuminate the oven interior for visibility during cooking․
Understanding the specific layout and function of each button is crucial for efficient oven operation․ Refer to the model’s specific manual for detailed explanations of each control‚ ensuring optimal performance and preventing accidental activation of unwanted features․ These buttons provide a tactile and familiar control method for users preferring a traditional interface․
Display Indicators & Error Codes
The GE double oven’s display panel utilizes various indicators to communicate oven status․ A preheat indicator illuminates during the preheating phase‚ signaling when the oven has reached the set temperature․ Active cooking modes‚ like Bake or Convection‚ are also clearly displayed․ Timer settings are shown prominently‚ counting down the remaining cooking time․
However‚ the display also presents error codes when issues arise․ These codes‚ often alphanumeric‚ pinpoint specific problems‚ such as a faulty temperature sensor or a communication error․ The manual provides a comprehensive list of these codes and their corresponding solutions․ Ignoring error codes can lead to further damage or unsafe operation․
Common indicators include a lock symbol when the control panel is locked‚ and a self-clean indicator during the self-cleaning cycle․ Regularly checking the display for any unusual indicators or error codes is vital for maintaining oven performance and safety․ Promptly addressing any issues ensures continued reliable operation․
Setting the Clock
Accurate timekeeping is crucial for utilizing the timer and programmed cooking features of your GE double oven․ To set the clock‚ first‚ ensure the oven is not currently in an active cooking cycle․ Locate the “Clock” or “Time Set” button on the control panel – its exact labeling may vary slightly depending on your specific model․
Pressing this button initiates the clock setting mode․ The display will typically flash the hour․ Use the number pads or up/down arrow buttons to adjust the hour to the correct value․ Press the “Clock” or “Time Set” button again to confirm the hour and move to setting the minutes․ Repeat the adjustment process for the minutes․
Finally‚ press the “Clock” or “Time Set” button one last time to save the new time․ Some models may also allow you to select a 12-hour or 24-hour time format within the settings menu․ A correctly set clock ensures all timed functions operate as intended‚ enhancing your cooking experience․
Using the Timer Function
The timer function on your GE double oven is a versatile tool for managing cooking times and ensuring food is prepared perfectly․ To activate the timer‚ press the “Timer” button on the control panel․ The display will prompt you to enter the desired cooking or countdown time using the number pads․
Once the time is entered‚ press the “Start” or “Timer” button again to begin the countdown․ The timer will continue to run even if the oven is turned off‚ making it useful for tasks beyond oven cooking․ The display will show the remaining time‚ and an audible alarm will sound when the timer reaches zero․
To cancel the timer before it expires‚ press the “Clear” or “Off” button․ Some models offer multiple timers‚ allowing you to track several tasks simultaneously․ Refer to your specific model’s manual for detailed instructions on utilizing all timer features․
Cooking Modes & Settings
GE double ovens offer diverse modes like Bake‚ Broil‚ Roast‚ Keep Warm‚ and preset programs‚ providing flexibility for various recipes and culinary preferences․
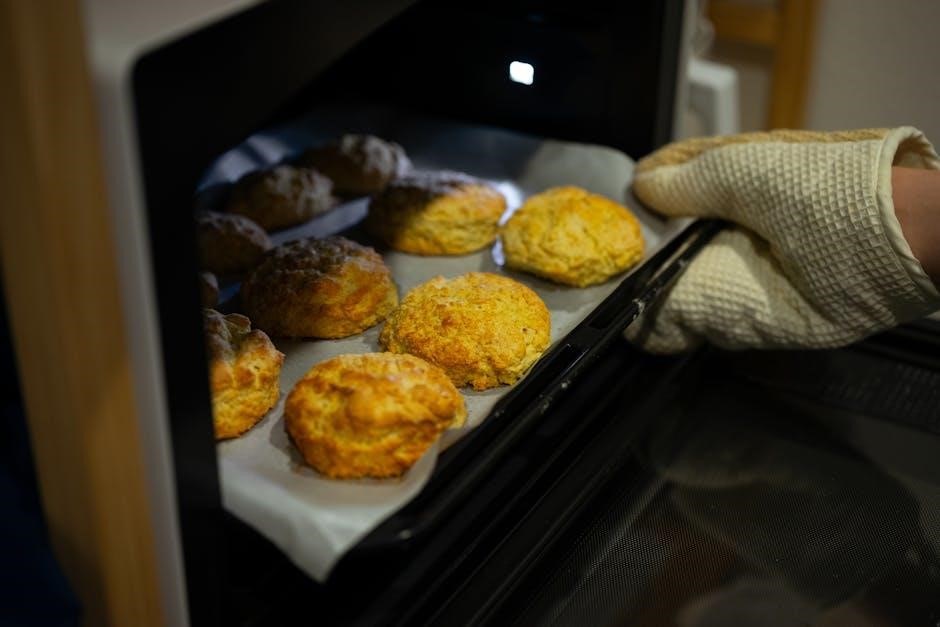
Bake Mode – Standard Baking
Bake mode on your GE double oven is designed for standard baking tasks‚ utilizing heat from the bottom element primarily‚ though both elements may cycle on and off to maintain a consistent temperature․ This mode is ideal for cakes‚ cookies‚ casseroles‚ and other baked goods where even heat distribution is crucial․
To utilize Bake mode‚ simply select it on the control panel and set your desired temperature․ The oven will preheat to the set temperature before beginning the baking process․ Remember to adjust rack positions according to your recipe for optimal results․ For best outcomes‚ avoid opening the oven door frequently during baking‚ as this can cause temperature fluctuations․
GE’s double ovens‚ particularly models like the Profile PT9550SFSS‚ often feature true European convection within the Bake mode‚ enhancing heat circulation for more uniform baking․ Experiment with different rack positions and baking times to perfect your favorite recipes within your specific oven model․
Broil Mode – High-Heat Browning
Broil mode on your GE double oven utilizes the upper heating element to deliver intense‚ direct heat‚ perfect for browning‚ searing‚ and finishing dishes․ This high-heat function is excellent for broiling meats‚ melting cheese on gratins‚ or toasting bread․ When using Broil mode‚ it’s crucial to position your oven rack appropriately – typically the highest or second-highest position – to achieve the desired level of browning․
Always use broil-safe cookware and monitor your food closely‚ as broiling happens quickly․ Leaving the oven door slightly ajar during broiling (as indicated in some GE oven manuals) can help regulate temperature and prevent excessive smoking․ Remember that broiling can produce smoke‚ so ensure adequate ventilation in your kitchen․
GE Profile models‚ such as the PT9550SFSS‚ may offer variable broil settings for greater control․ Familiarize yourself with your oven’s specific broil options for optimal results and safe operation․
Roast Mode – For Larger Cuts of Meat
The Roast mode on your GE double oven is specifically designed for cooking larger cuts of meat‚ poultry‚ or even vegetables․ Unlike Bake mode‚ Roast utilizes a combination of radiant heat from the upper element and convection heat‚ circulating warm air around the food for even cooking and beautifully browned exteriors․ This mode typically operates at higher temperatures than Bake‚ ensuring efficient and thorough cooking․
When using Roast mode‚ consider using a roasting pan with a rack to elevate the food‚ allowing for better air circulation․ For optimal results‚ preheating the oven is recommended․ GE Profile ovens‚ like the PT9550SFSS‚ may offer specific Roast settings or temperature recommendations for different types of meat․
Always use a meat thermometer to ensure the internal temperature reaches a safe level․ Roasting times will vary depending on the size and type of food‚ so consult reliable cooking guides․
Keep Warm Setting
The Keep Warm setting on your GE double oven is a convenient feature designed to maintain food at a safe and palatable temperature without continuing to cook it․ This is incredibly useful when you’ve finished cooking different components of a meal at varying times‚ allowing you to hold dishes until everything is ready to serve․
Typically‚ the Keep Warm setting operates at a low temperature‚ usually around 170°F (77°C)․ It’s ideal for holding cooked casseroles‚ roasted meats‚ or side dishes for up to three hours․ However‚ it’s important to note that the Keep Warm function isn’t intended for holding perishable foods for extended periods․
GE Profile models‚ such as the PT9550SFSS‚ often integrate the Keep Warm setting seamlessly into their touchscreen interface․ Always check your specific model’s manual for detailed instructions and recommended usage guidelines to ensure food safety and quality․
Preset Cooking Programs
GE double ovens‚ particularly the Profile series like the PT9550SFSS‚ boast a range of preset cooking programs designed to simplify meal preparation․ These programs automatically set the optimal temperature and cooking time for various dishes‚ taking the guesswork out of baking and roasting․
Common presets include options for pizza‚ cookies‚ cakes‚ broiling‚ and roasting poultry or meats․ Some models even feature specialized programs for specific types of cuisine or cooking methods; Utilizing these presets ensures consistent results and reduces the need for manual adjustments․
The touchscreen interface allows easy selection of these programs․ Refer to your oven’s manual for a complete list of available presets and detailed instructions on how to use each one effectively․ These programs are a key feature contributing to the appliance’s smart functionality․
Maintenance & Troubleshooting
Regular cleaning‚ light bulb replacement‚ and addressing error codes are crucial for maintaining your GE double oven’s performance and longevity‚ ensuring optimal functionality․
Cleaning the Oven Interior
Maintaining a clean oven interior is essential for optimal performance and food safety․ GE double ovens offer both self-cleaning and steam clean options․ For the self-cleaning cycle‚ ensure the oven is empty and the door is locked before initiating – this process uses high temperatures to burn off residue․
Alternatively‚ the steam clean function utilizes moisture to loosen light soils‚ making wiping easier․ For manual cleaning‚ always disconnect power and allow the oven to cool completely․ Use a non-abrasive cleaner specifically designed for ovens‚ avoiding harsh chemicals that could damage the interior surfaces․
Pay attention to racks and the oven floor‚ removing any baked-on food particles․ Regularly wiping spills as they occur prevents stubborn buildup․ Remember to rinse thoroughly with clean water after using any cleaning solution‚ and dry all surfaces before resuming oven operation․ Proper cleaning extends the life of your GE double oven and ensures consistently delicious results․
Replacing the Oven Light
If the oven light burns out‚ replacing it is a straightforward process․ Always disconnect the oven’s power supply at the circuit breaker before attempting any repairs to prevent electrical shock․ Locate the oven light cover‚ typically found at the back of the oven cavity‚ and carefully remove it – consult your specific model’s diagram if needed․
Once the cover is off‚ you’ll see the light bulb․ Unscrew the old bulb‚ noting its wattage and type (often a standard appliance bulb) to ensure you purchase a suitable replacement․ Screw in the new bulb securely‚ but don’t overtighten․ Reattach the light cover‚ ensuring it’s properly seated․
Restore power to the oven at the circuit breaker and test the new light․ If it doesn’t illuminate‚ double-check the bulb is correctly installed and the power is fully restored․ Using the correct bulb type is crucial for safe and efficient operation of your GE double oven․
Troubleshooting Common Issues (Error Codes)
GE double ovens utilize error codes to diagnose potential problems․ These codes appear on the control panel display‚ signaling issues ranging from temperature sensor failures to communication errors․ Consult your oven’s specific manual for a complete list of error codes and their meanings – a general troubleshooting guide is often included․
Common issues include “F1” or “F2” codes indicating temperature sensor problems‚ potentially requiring sensor replacement․ “E1” or similar codes might suggest control board malfunctions‚ often necessitating professional repair․ If you encounter a locked oven‚ try resetting the control panel or referring to the ‘Dealing with a Locked Oven’ section․
Before calling for service‚ attempt a power cycle – turning off the oven at the breaker for several minutes‚ then restoring power․ This can often resolve minor glitches․ Remember to record the error code before contacting GE appliance support for efficient assistance․
Dealing with a Locked Oven
A locked oven door is a safety feature‚ often activated during the self-clean cycle or by accidental control panel presses․ If the door is locked after a cleaning cycle‚ allow the oven to cool completely before attempting to unlock it – this can take several hours․ Avoid forcing the door open‚ as this could cause damage․
For ovens locked outside of the self-clean cycle‚ try pressing the ‘Clear/Off’ or ‘Cancel’ button on the control panel․ If this doesn’t work‚ a brief power cycle – switching off the oven at the breaker for a few minutes – may reset the control board and unlock the door․
If the door remains locked‚ consult your GE double oven manual for model-specific instructions․ If problems persist‚ contact GE appliance support for assistance‚ providing your model number for accurate troubleshooting guidance․ Never attempt to disassemble the locking mechanism yourself․
GE Appliance Support & Warranty Information
GE offers comprehensive support for your double oven‚ ensuring long-term performance and peace of mind․ For immediate assistance‚ visit the GE Appliances website (geappliances․com) where you can access FAQs‚ troubleshooting guides‚ and downloadable manuals specific to your model number․
You can also connect with GE’s customer service team via phone or live chat․ Have your model and serial number readily available for efficient support․ GE provides a standard one-year limited warranty covering parts and labor for repairs necessitated by manufacturing defects․
Extended warranty options are often available for purchase‚ offering additional coverage beyond the initial warranty period․ Register your appliance online to activate your warranty and receive important product updates․ Keep your purchase receipt and warranty documentation in a safe place for future reference․